
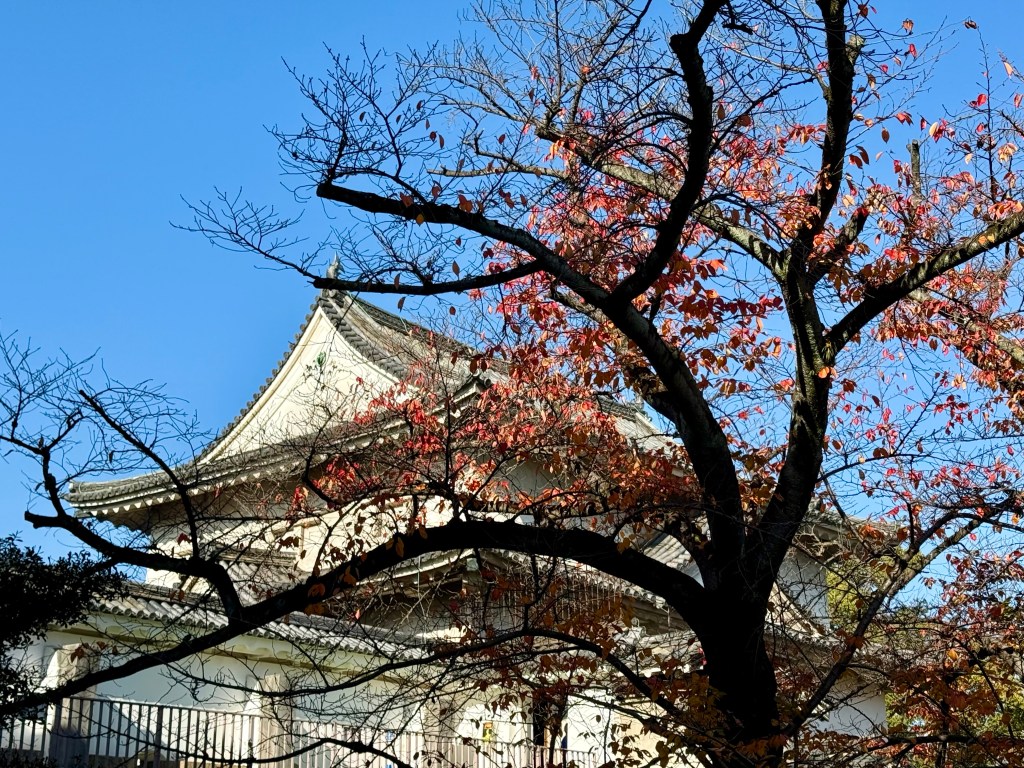
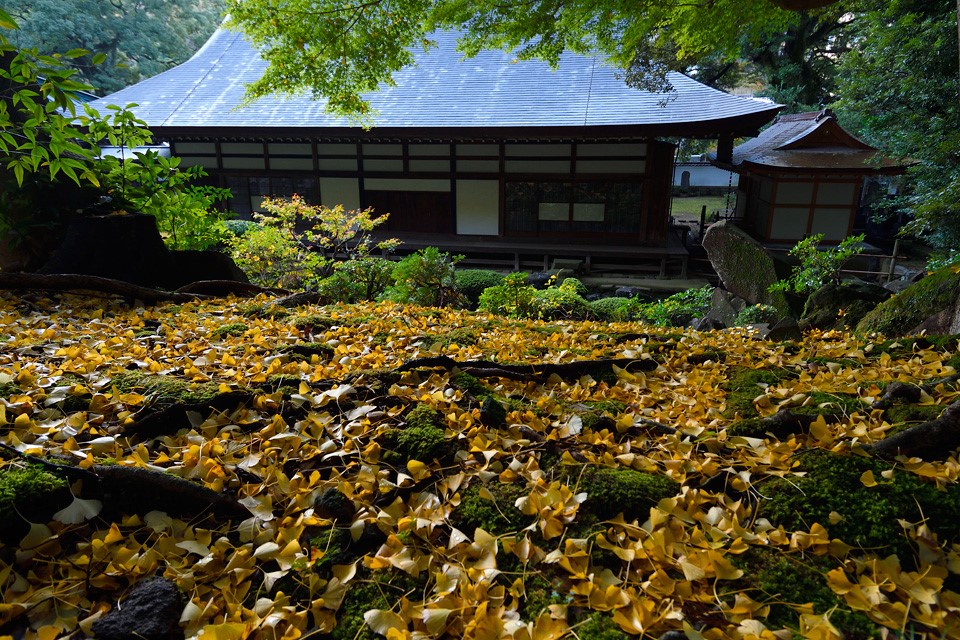
After seven unforgettable days wandering through Japan’s autumn foliage (not counting flight days), we’re finally home—phones full of photos, hearts full, and legs just a little tired from all the exploring. We averaged about 20,000 steps a day! Before I dive into the stories and highlights from this trip, I wanted to start with something even more useful: the small but important, practical travel tips that made our journey smoother, easier, and far more enjoyable.
If you’ve been following along on MakingMemories.blog, you may remember my previous Japan posts—Understanding the Unspoken Rules of Japanese Manners and Etiquette, Nikko: An Escape into Nature, Tokyo: A juxtapose of modernity and tradition, and Japan: What you need to know before visiting. This was only our second visit, but each trip teaches us new lessons—things you won’t always find in guidebooks, but that make a big difference once you’re on the ground—especially if you’re visiting for the first time or traveling with children.
Here are the most useful tips from our recent Thanksgiving trip:
- 🌤️1. Use Japan’s Official Weather Website for Accurate Forecasts
- 🧴2. Public Restrooms Often Have No Soap
- 🧻3. Bring a Small Towel—Most Restrooms Don’t Have Paper Towels
- 🔥4. Heat packs
- 🧳5. Disposal of Broken Luggage Is Complicated
- 🚉6. IC Cards for Children: What Parents Should Know
- 💳7. General Suica Card — Handy for Everyone
- 🚌8. City Buses – IC Cards, Cash, and Future Tap-to-Pay
- 🚇 9. Metro/Bus passes – Yay or Nay?
- 🚄10. JR Pass: Not Always Worth It Anymore — Use a Calculator Before You Buy
- 📘11. Carry Your Passport (Always)
- 🛍️ 12. Japan Tax-Free Shopping Tip
- 📆 13. Check Snack Expiration Dates Before Buying
- 🧳 14. Bring Extra Luggage Space
- 🧺 15. Laundry Takes Longer Than You Expect
- ☕️ 16. Convenience Stores Save Early Risers
- 💴 17. Currency Exchange Is Easy at Convenience Stores
- 🔐 18. Coin Lockers Can Be Confusing — Use a Tracker or Choose Staffed Storage
- 🟨19. Notice the Yellow Tactile Blocks — They’re Tenji Blocks for the Visually Impaired
- 🎟️20. Many Top Attractions Require Advance Booking
🌤️1. Use Japan’s Official Weather Website for Accurate Forecasts
Weather in Japan can change quickly, especially in mountain regions. Many general weather apps under-report rainfall or temperature swings. The most reliable source we used daily was the Japan Meteorological Agency. It provides:
- real-time rain radar
- hourly precipitation charts
- temperature trends
- typhoon and storm updates
This site can help you plan hiking days, photography spots, and even which city to explore first.
🧴2. Public Restrooms Often Have No Soap
One of the most consistent surprises on this trip: many public bathrooms still don’t provide soap, even in large stations and tourist areas.
The best workaround is to carry sheet soap—ultra-thin soap papers that dissolve instantly with water. They’re compact, hygienic, and TSA-friendly.

🧻3. Bring a Small Towel—Most Restrooms Don’t Have Paper Towels
Many locals carry a handkerchief or mini hand towel, and now we understand why. Many bathrooms have hand air-dryers, but not all. While restrooms in Japan are generally clean and reliable, drying your hands is your responsibility. A quick-dry towel or small handkerchief is incredibly useful—especially when traveling with kids or during cold months.
🔥4. Heat packs
You’ll quickly realize that most days in Japan are spent outdoors—walking to train stations, strolling between sights, and exploring neighborhoods in search of good food. One thing that made a huge difference for us was heat packs. They became our must-have essentials for staying warm on the go.
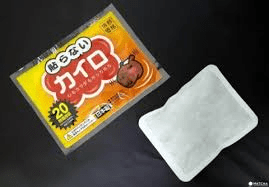
Kairo are small sachets filled with heat-generating materials. Once exposed to air, they warm up through oxidation and can stay hot for hours—sometimes up to 24 hours—making them perfect for keeping warm throughout the day.
You can slip them into your coat pockets to warm your hands, tuck one into the inside chest pocket of your coat, or place them anywhere you need a little extra heat.
They now come in all kinds of variations, including heat packs for socks and shoes. If your toes tend to get cold or painful when walking in chilly weather, these are a game-changer. Most foot warmers stay warm for around 5 hours, which is just right for a full day of sightseeing.
The best part? They’re inexpensive and easy to find at places like Daiso and Don Quijote. We love the kairo so much that we purchased a few boxes to bring home!
🧳5. Disposal of Broken Luggage Is Complicated
Japan’s garbage rules are strict, and most hotels cannot throw away large items for you (including broken suitcases).
If your luggage breaks:
- Don Quijote may dispose of it only if you buy new luggage there.
- Services like Tokyo Helping Hands can assist with small-item disposal.
- Some disposal services only pick up every 1–2 weeks, so timing matters.
- Few hotels provide the luggage disposal service for a fee. We stayed at JR Kyushu Hotel Blossom Shinjuku, and this service was offered (we didn’t use the service but saw a sign at the reception).
This is worth planning for, especially at the end of a trip when you’re heading to the airport.
🚉6. IC Cards for Children: What Parents Should Know
Traveling with kids in Japan is incredibly efficient once you understand the IC card system. Here’s what we learned:
Children Ages 6–11:
They qualify for a Child Suica (or Child Welcome Suica) offering a 50% fare discount.
Where to get it:
- At a staffed JR ticket office (Tokyo Station, Shibuya, Haneda Airport, etc.)
- Not available via vending machines
What you need:
- Child’s passport (required for age verification)
- A short form with name + birthdate
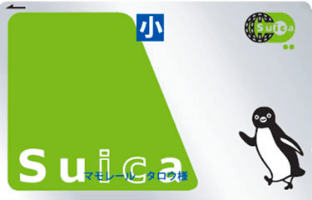
The card will have the kanji for “child” printed on it.
It works exactly like an adult Suica—just cheaper.
Important: Child IC cards cannot be added to Apple Wallet due to age restrictions; you must carry the physical card.
Valid until:
- March 31 following the child’s 12th birthday
Children Under 6:
- Ride free on trains, subways, and buses
- Up to two children under 6 can ride free per accompanying adult (or per child aged 6–11)
💳7. General Suica Card — Handy for Everyone
Beyond the child IC card, a regular Suica card is a great all‑around travel convenience when you visit Japan. It’s a rechargeable, contactless smart card (using FeliCa NFC) that works across trains, subways, many buses, and even in shops, vending machines, and convenience stores — basically wherever you see the “IC” or Suica/IC logo.
- How to get it: You can buy a new Suica at JR East ticket machines or offices (often including major airports). The typical cost is ¥2,000 — which includes a ¥500 deposit plus ¥1,500 preloaded credit.
- Reloading the card: The standard (physical) Suica card generally must be reloaded with cash at ticket machines, kiosks, convenience stores, or fare‑adjustment machines.
- Digital Suica / Mobile Suica / Apple Wallet Suica: If you prefer convenience, you can add Suica to a smartphone or smartwatch (on supported devices) — no physical card needed. Once loaded, you can recharge via Apple Wallet (or a supported digital wallet) — which allows credit‑card top‑ups. This can be much easier than hunting for cash machines or stores, especially when traveling.
- Why digital Suica is often ideal for travelers: With the digital version you avoid juggling a separate plastic card — you just tap your phone; top‑ups are easier if you have a linked card; and you can quickly check your balance.
✨ Travely Tip:
You can return your Suica at the end of your trip for a refund, but if you know you’ll come back to Japan, keep it—IC cards remain valid for 10 years.
For other payment options, read my post on The Best Cards for Travelers by Country.
🚌8. City Buses – IC Cards, Cash, and Future Tap-to-Pay
Getting around Japanese cities is surprisingly easy thanks to the convenience of IC cards, like Suica, PASMO, or ICOCA. Most city buses accept IC cards for payment — simply tap when boarding (or sometimes when exiting, depending on the route), and the fare is automatically deducted.
For cash users, city buses also accept coins or ¥1,000 bills, and drivers provide change. This is especially handy for families, tourists, or anyone who prefers not to carry an IC card.
Some cities in Japan, such as Osaka, are now rolling out tap-to-pay systems that allow contactless payments with major credit cards or smartphones. In Kyoto, the city transportation bureau is preparing a similar system, but as of late 2025, credit and debit cards are not yet accepted on Kyoto City Buses — so it’s safest to rely on IC cards or cash when traveling there.
Pro tip: Always carry a bit of cash as a backup. Even where tap-to-pay is available, smaller or regional buses may only accept IC cards or cash. Using an IC card remains the fastest, simplest, and most flexible way to ride buses across Japan.
🚇 9. Metro/Bus passes – Yay or Nay?
Short answer: It was nay for us! Why? Read more: Metro & Bus Passes in Japan: What Actually Worked for Us.
🚄10. JR Pass: Not Always Worth It Anymore — Use a Calculator Before You Buy
If you read my earlier post “Japan: What You Need to Know Before Visiting,” you’ll remember that I mentioned the JR Pass as a convenient option for visitors. However, since the major price increase in late 2023, the pass is no longer the automatic money-saver it used to be.
A 7-day Ordinary JR Pass now costs ¥50,000, which means you need to take multiple long-distance Shinkansen trips in a short period for it to break even. For many travelers—especially those exploring only Tokyo and Kyoto, or doing a mix of short-city trips—it often ends up more expensive than buying individual tickets.
To know for sure, the easiest way is to plug your planned routes JR Pass Cost Calculator.
This tool lets you enter all your train rides and compares the total cost to the price of the pass. It’s the simplest way to see if the JR Pass makes sense for your trip.
For our 7-day autumn trip, even with Shinkansen rides between cities, the pass would not have been worth it—buying tickets individually came out cheaper.
To make bullet train reservations, visit the SmartEx booking system. There’s a recommended mobile app as well.
📘11. Carry Your Passport (Always)
One thing that’s easy to forget—but genuinely important—is that tourists in Japan are required to carry their passports at all times. While it’s unlikely anyone will ask for it, having it with you is useful more often than you’d expect.
Most notably, you’ll need your passport for tax-free shopping, which is offered at many department stores, electronics shops, and even some drugstores. Instead of fumbling through your bag later, it’s simpler to keep your passport tucked in a secure, easy-to-access pocket.
🛍️ 12. Japan Tax-Free Shopping Tip
When buying tax-free consumables in Japan—like food, drinks, cosmetics, or medicine—do not open or use them while still in the country. Stores seal these items specifically for export, and breaking the seal could make you liable for the 10% consumption tax at customs.
- General goods (clothing, electronics, housewares) can be used in Japan; only consumables must stay sealed.
- Mixed purchases of general goods and consumables are treated as consumables—so nothing can be opened until you leave Japan.
- Your tax-free purchases are linked to your passport, and customs may spot-check your items and receipts at departure.
Pro tip: Keep all tax-free items sealed and receipts handy to avoid surprises at the airport.
📆 13. Check Snack Expiration Dates Before Buying
Japanese snacks and sweets (like Nama matcha chocolate, yatsuhashi, mochi, castella, etc.) often have surprisingly short shelf lives — sometimes only 1–2 weeks.
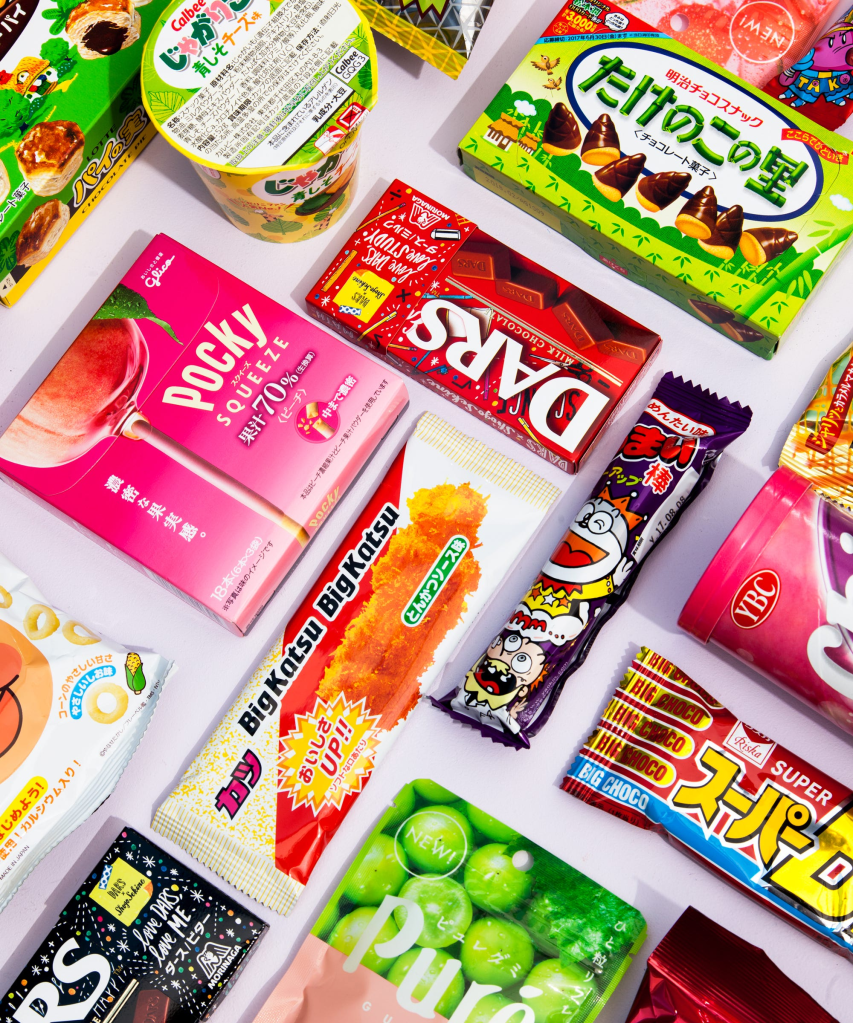
If you’re buying treats to bring home:
- Always check the expiration date on the front or back of the package.
- Choose items with a longer shelf life (baked or dry snacks last longer than fresh or refrigerated ones).
- Buy perishable items toward the end of your trip so they stay fresh when you return.
For items like Nama Chocolate, remember they need to be refrigerated. If you purchase them at the airport, you can buy an insulated bag with a gel ice pack to keep them cool for several hours.
Also note that some fresh cakes and pastries at the airport have a very short freshness window — not printed on the packaging, but verbally mentioned by staff. One cake we saw could be kept cool in the package for only about 11 hours, which may not be long enough if you have a long flight or layovers.
Many travelers overlook this (especially if you’re used to long-lasting U.S. snacks). My travel companion made this exact mistake: bought tons of treats because they were delicious… only to discover they would expire in just two weeks.
🧳 14. Bring Extra Luggage Space
Japan is shopping paradise — snacks, souvenirs, skincare, toys, gachapon, home goods… it adds up fast.
To avoid overweight charges or last-minute suitcase panic:
- Either under-pack your suitcase from home,
- Or bring a lightweight foldable duffel you can expand on the way back,
- Or buy a new suitcase in Japan — stores like Don Quijote sell them at surprisingly affordable prices.
You’ll thank yourself when you suddenly fall in love with matcha KitKats, Muji snacks, or the pottery you didn’t plan to buy.
Some travelers consider shipping extra baggage home, but be cautious:
Paying for excess baggage on your flight is often cheaper than international shipping, and you avoid dealing with customs paperwork and potential tariffs.
🧺 15. Laundry Takes Longer Than You Expect
Doing laundry in Japan is convenient but much slower than in the U.S. Many hotels and Airbnbs use compact machines, and the wash + dry cycle can take much longer than you’re used to— especially if you’re washing thick clothes.
- Some hotels have combined washer–dryer units that do everything in one go.
- Others have separate washers and dryers — at JR Kyushu Hotel Blossom Shinjuku, washing was 100 yen for 30 minutes, and drying was 100 yen for 30 minutes.
- Larger combination machines were 300 yen for a full wash + dry (about 1 hour).
- Machines usually take 100-yen coins only, but reception can exchange bills for coins.
- Airbnb machines are smaller and even slower since they aren’t commercial grade.
- Many machines also auto-dispense detergent, so you don’t need to add your own.
- You can add more drying time mid-cycle by inserting additional coins — helpful because 1 hour of drying is usually not enough for thicker shirts, jeans, or hoodies.
- There are also laundromats in big cities.
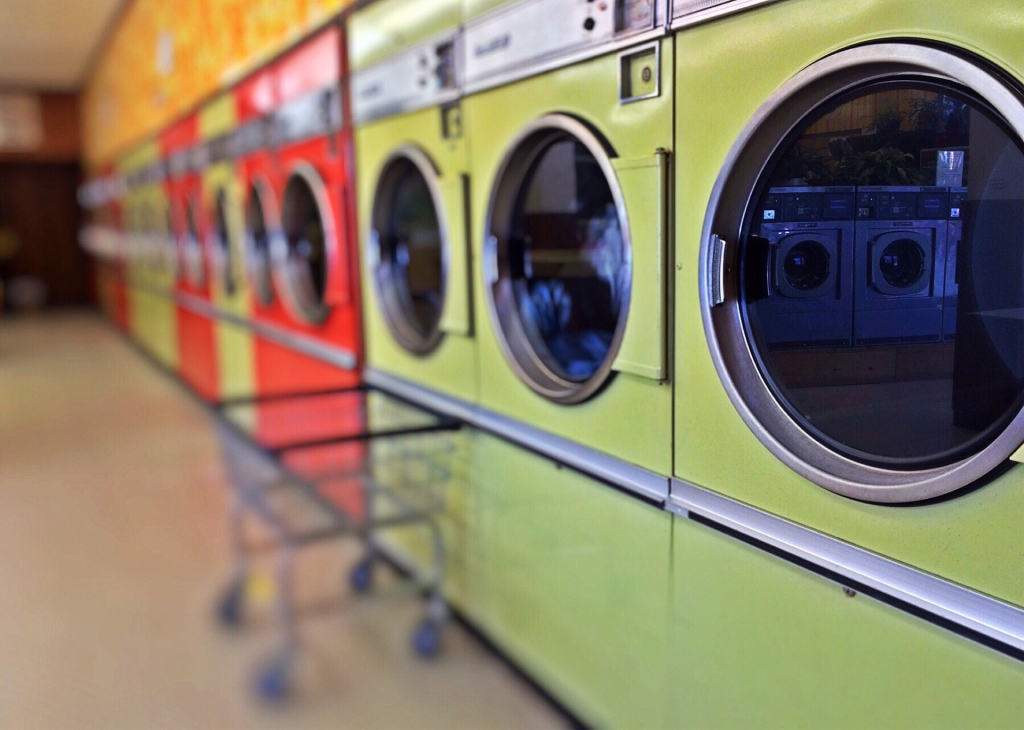
Plan laundry time ahead — especially if you’re trying to wash clothes between busy travel days. It took us about 3 hours to properly dry a medium load of clothes. We were stuck with some damp clothes on our last day in Tokyo. We had to pack them separately and then hang-dried them when we checked in our Airbnb in Kyoto (the dryer at the Airbnb didn’t do a proper job, so even after drying in the machine, we had to hang our clothes to have them completely dry.) Note that we did our laundry the night (very late) before our last day in Tokyo; had to re-dry them the next morning before handling our luggage to the forwarding service, with some damp clothes packed separately. Plan ahead and avoid our mistake!
☕️ 16. Convenience Stores Save Early Risers
Family Mart, Lawson, and 7-Eleven are open 24/7 — but many cafés, bakeries, and shops don’t open until much later in the morning.
If your hotel doesn’t serve breakfast or you need to eat early for medication or preference, convenience stores are a lifesaver.
You can grab:
- Onigiri
- Fresh sandwiches
- Hot coffees
- Yogurt, fruit, or pastries
- Fully prepared hot meals
Don’t underestimate them — conbini breakfasts are surprisingly good.
💴 17. Currency Exchange Is Easy at Convenience Stores
Outside of airports and major train stations, you won’t find many dedicated currency exchange counters in Japan. But the good news is that many convenience stores have automated currency exchange machines, and because places like 7-Eleven, Lawson, and Family Mart are open 24 hours, you can exchange cash anytime, even late at night or early in the morning.
It’s fast, reliable, and much more convenient than hunting for a bureau de change.
🔐 18. Coin Lockers Can Be Confusing — Use a Tracker or Choose Staffed Storage
Coin lockers at major train stations are incredibly convenient, but the sheer number of them can feel overwhelming—especially in big transit hubs like Shinjuku or Kyoto Station. It’s not uncommon to hear stories of travelers forgetting which locker they used!
To avoid the panic, place a small tracking device (like an Apple AirTag or equivalent) in your luggage so you can easily locate it from your phone.
Alternatively, choose a staffed luggage storage service instead of self-service lockers. These counters are often easier to manage, especially if you’re carrying multiple bags or traveling with kids.
🟨19. Notice the Yellow Tactile Blocks — They’re Tenji Blocks for the Visually Impaired
As you walk around Japan, you’ll often see yellow textured tiles on sidewalks, train platforms, and even inside public buildings. These are Tenji blocks (also known as tactile paving), designed to help visually impaired individuals navigate safely and independently.
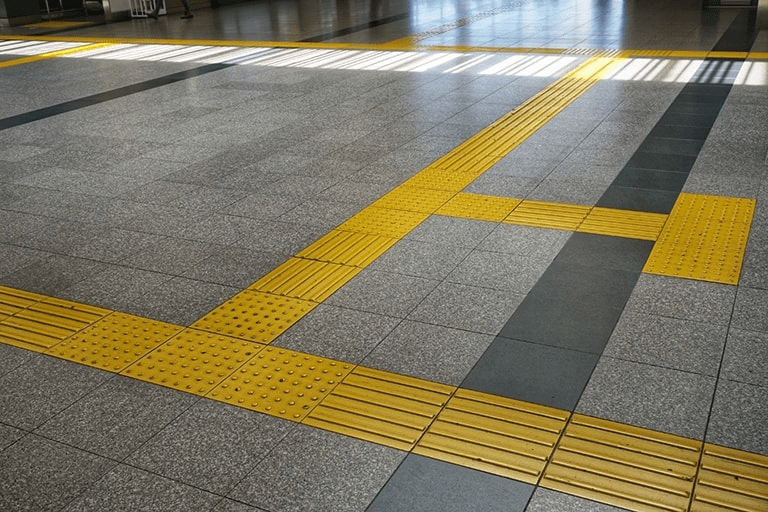
There are two main types you’ll notice:
- Line blocks (long bars):
These guide walking direction, like a tactile pathway. - Dot blocks (raised dots):
These signal warnings—such as an upcoming crosswalk, stairway, platform edge, or building entrance.
Tenji blocks are found almost everywhere in Japan, even in rural towns, and they’re part of what makes the country so highly accessible. It’s worth being mindful not to stand or leave bags on them so that those who rely on tactile pathways can navigate freely.
It’s one of those small, thoughtful details that reflects Japan’s strong commitment to accessibility and universal design.
🎟️20. Many Top Attractions Require Advance Booking
Some of Japan’s most popular attractions fill up days or weeks ahead, especially during peak seasons. Here are the ones that absolutely require advance reservations:

Tokyo & Surroundings
- Ghibli Museum (Mitaka) – sells out fast
- Ghibli Park (Nagoya)
- TeamLab Borderless
- Shibuya Sky – entry during sunset is especially popular. Tickets are sold 30 days in advance, and are sold out quickly.
- Yayoi Kusama Museum
- Tokyo Disneyland and DisneySea
Kyoto
- Sagano Romantic Train
- Kyoto Arashiyama Private Yakatabune or Hozugawa River Boat Ride – boat cruise, some with lunch options.
Osaka
- Universal Studios Japan (USJ) – express passes are sold out very fast.
- Super Nintendo World (often requires a timed entry)
Booking in advance saves hours of waiting—and ensures you don’t miss out.
These practical tips made our autumn trip far smoother and more enjoyable. From small surprises like portable soap to saving on kids’ fares and checking JR Pass value or planning laundry time, the details really make a difference. These are honest tips based on our experience (lessons learned), and I hope you find them helpful—small choices like these can turn a good trip into a truly stress-free and memorable one.

Leave a comment